Monday, March 28, 2011

Thermostat housing adapter

This one took some tinkering to get right, but its finally finished.  All of the hoses are the original Porsche ones.  I went that route because they were all new and hopefully I will remember what they came from in the future.

You can see that it passes very close to the water pump.  I had to make it in this manner so that the alternator (which isn't installed in this pic) will have enough room to move around just to the right of the pipe.  It's adjustment arm travels over the water pipe to the mount by the cam sync sensor (not installed in the picture either). 


Here is a little different angle.  The AAN comes with a composite thermostat housing, this one is off of a 7a I think, but it could have been an older motor.  I got lots of parts like this from Force 5 Salvage.  You can google them if you need some bits.

Bellhousing finished

I wanted to show the final version of the bellhousing.  It is ready to be installed in these pictures. 

All the lines are -3AN.  The supply line goes through the original fork hole and the bleed line goes through an opening that I made.

One shot from the rear face.  The lines are braided stainless with a teflon jacket, but I put some rubber hose around them for protection where they pass through the bellhousing.


This is a closeup of the boss that I fabbed for the bleed line to pass through.  It was made from some 120" thick aluminum tubing and welded into place.

Intake system

So, I know I have touched on this area before, this will wrap up the first try at this.  I really want to get one of the Porsche manifolds and reverse it like I have seen on the web, but this should get us going.

This is a top down view of finished throttle body relocator.  The red wheel you see on the TB is from the Porsche TB.  I originally got it from Lindsey Racing.  The shaft of the Audi TB is slightly larger so I reamed the hole slightly, removed the Audi bits and installed the Porsche unit.  A small hole in the cable wheel allows you to install a bolt to keep the wheel from spinning on the TB shaft in an undesired manner.

Here you can see the bolt I was talking about.  The small gold wheel used to change the cable direction is actually for a shower door.  It has sealed bearings and seems to be a good fit for the application.  Lots of goosing the throttle has yet to make the cable come off the wheel, but I'm still concerned that this may need some attention.


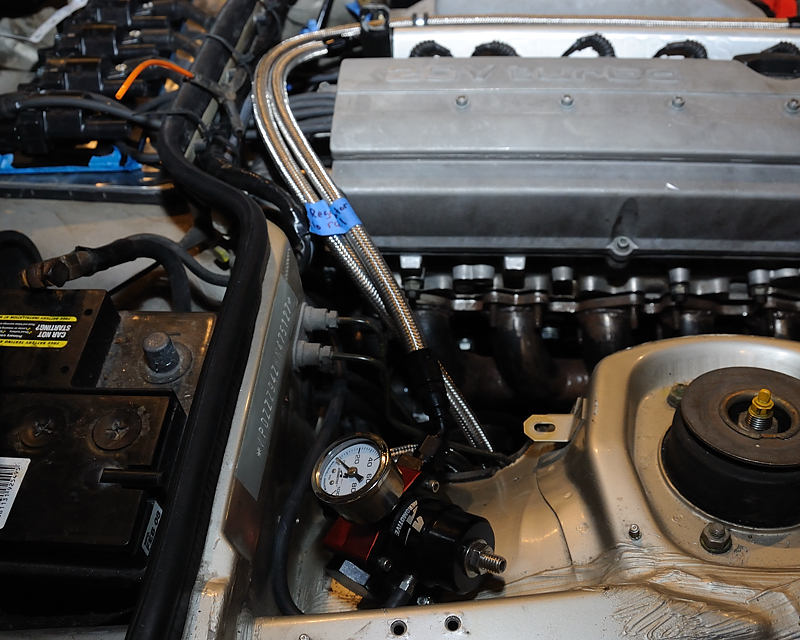
This is showing the room we now have between the brake master cylinder and the intake.  I used the stock 944 cable and didn't modify anything else in the system to get it to function again.

Fuel System

So the rest of the fuel system is in place as pictured below.
Here is the front of the EFI Express rail, you can see that the forward lifting point is going to be in the way.  I bought another lifting point and modified it.  I removed the lifting eye, moved the mount for the cam position sensor down and added an attachment point for the alternator adjustment.

Here is a view from the front with the new 630 cc injectors.  The braided lines attach to the stock hard lines in the passenger wheel well.

This one shows the location of the Aeromotive FPR.  In the upper left you can see the LS series coil pack replacement units that I sourced from EFI Express.  They are located where the heating and a/c unit used to live.  A little hole cut through the sheet metal lets the coil leads pass from the motor straight to the coils.

Friday, March 25, 2011

Slacker

I know I have been slacking....a lot on the blog, but lots of updates are coming so check back.  The time to start it up is getting close.