Okay so I got the adapter back and have fitted it to the bellhousing, so lets check it out.
Below you can see the assembly bolted in place. I'm going to route the supply line through the hole that the 931 clutch fork came through, so the bearing journal is going to be in the way.
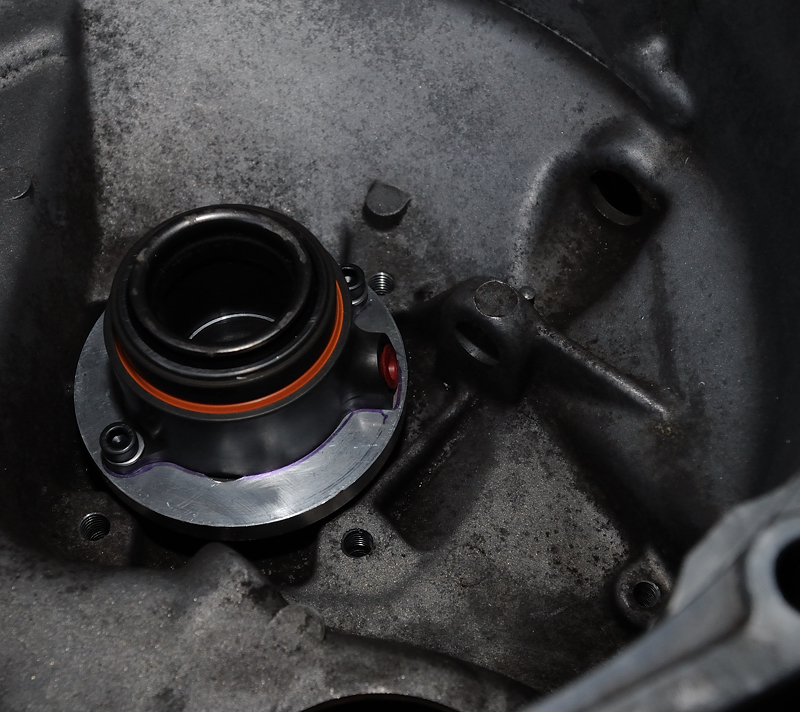
A die grinder made short work of that job and now there should be plenty of room for the hose with a 45 degree end on it to attach to the bearing.
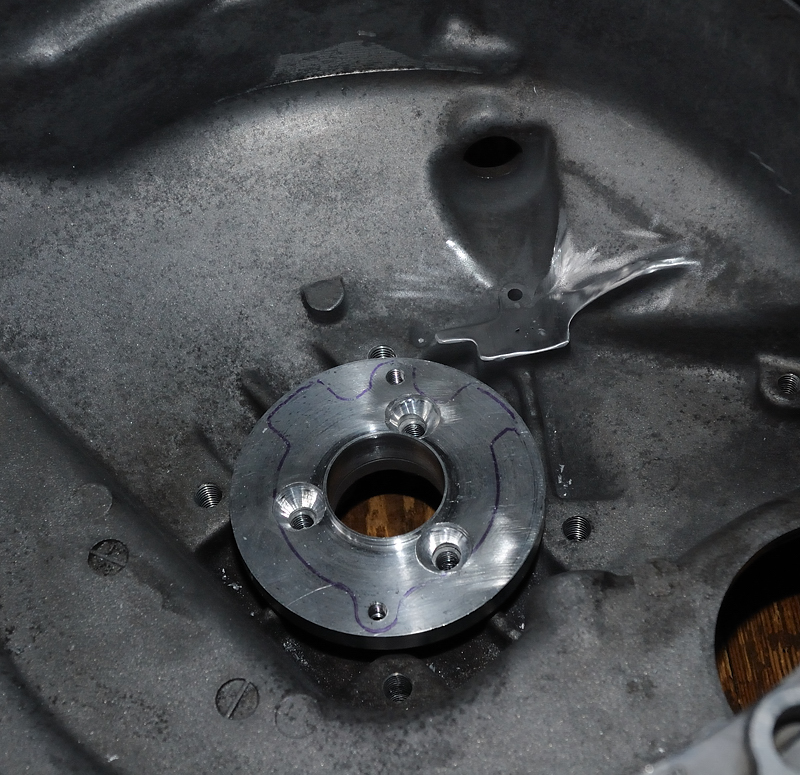
Adapter is back in place minus the bolts. I used a marker to show that the bolts that hold this in place will be under the bearing, so I used counter sunk 8mm cap screws. The OEM bolts here are 7mm, but I couldn't find any counter sunk cap screws in that size.
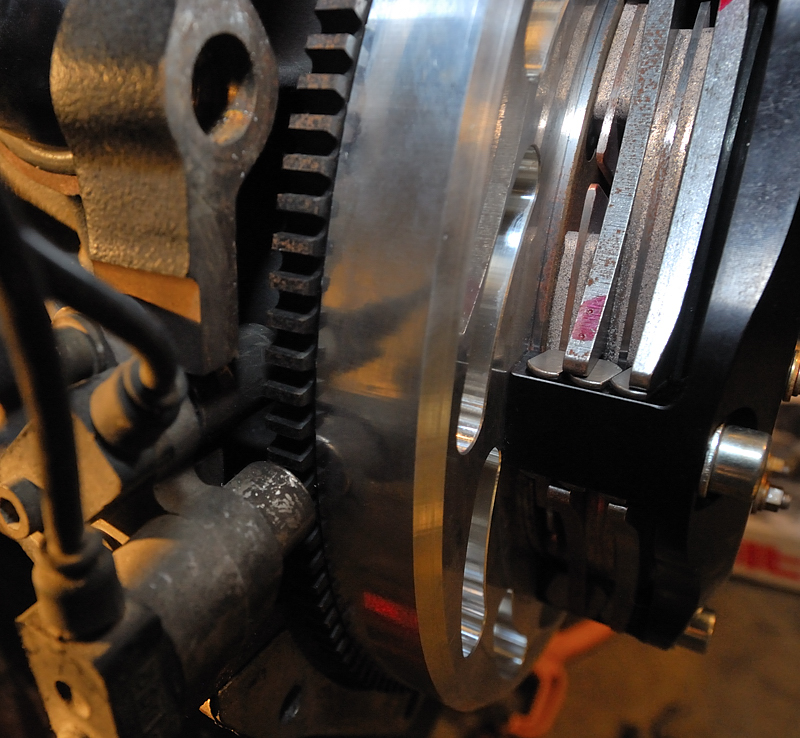
Finally here is the bearing back on top, there should be plenty of room for the hose now. Be sure to blend out the marks from the die grinder. Aside from possibly cutting the hose they could give a crack a place to start.
Friday, December 31, 2010
Wednesday, December 29, 2010
Things on the horizon
I have been over and over what I should do about instrumentation. I like how easy it is to read analog gauges and have to say that I like how they look also. However I think that going digital just makes more sense. There are many different digital systems to choose from. You can spend weeks looking into this subject, I know I have. So I promised myself that I would just go with the Race Technologies Dash2 and DL1 data logger. One of the main factors for choosing this one is that it can read info from the VEMS and log it. Most of the others won't. Along with this will be a fiberglass replacement dash probably from Broadfoot racing, also a rollbar setup that can become a full cage if need be. Most likely I will go with the unit from Hanksvillehotrods. It welds in with lots of different options. I still need two OEM cup II rims that are 9 inches wide and probably a set of Sparco harnesses.
Final clutch parts
Hopefully the last of the clutch parts will be done tomorrow. I feel like this portion of the build is holding up the whole of everything else. I have pretty much totally replaced the whole clutch system with Tilton products. Probably about 1300 usd not counting the flywheel. Painful for the pocket book, but hopefully it removes the growing pains. The clutch is a twin disk unit, I went with the 61-802 throwout bearing, and will order the 75-750u master cylinder after I measure what length hydro lines that I need. The part that I am waiting on is the adapter plate to mount the throwout bearing into the bellhousing. The machinist is also truing the turbo manifold and making some alignment pins for me.
Now you don't have to have all the parts that I have used. I'm sure that the original master cylinder would work with the right fittings. The threads in the end of it are m12 x 1.00 FYI. Your stuck with switching to a hydro bearing although there are many to choose from, and there are a lot of clutch options out there if you are creative with mixing and matching. You could probably do it cheaply for about 3-400. My route will be more like 2k with the flywheel and all thrown in.
EFIExpress Chevy coil swap
I haven't even heard this motor run yet, hopefully it does. Anyway without knowing the service history of it I figured I would just replace the ignition system in an attempt to avoid some problems in the future. If your 944 isn't gutted like mine you will have to find another location for the coils than were I plan to place them. Just by laying the sparkplugs out it looks like they will reach this location fine. On first look I think I will run the supporting wiring to the VEMS through the grommet that the heating units low speed resistors got their power from. It's located above the battery just behind the vacuum reservoir. I'm waiting to get the motor back in before I move too much farther with this portion of the project. The big plate under the coils is covering the hole where the heating and a/c unit used to be.
Flywheel Sync Pin
When I ordered the 034 flywheel there was some concern over whether or not the pin that triggers the VR sensor would be in the correct place for use with the VEMS system. To me it sounds like the VEMS ecu requires the pin to be more precisely located than the stock ecu requires. The failure mode is basically a non start condition. The computer requires the Camsync and VR reference pin to both be seen at specific locations before the motor will start. Marc at EFIExpress educated me on how to check if your pin will be close enough, so I'll pass this on to you guys. This is simple enough if I understood it correctly.
Below you are looking at the camsync hall sensor (the flashlight is shining on it). It's easy to find, just follow the wiring. We are concerned with the dark area behind it, which is a cutout in the perimeter of the disk behind the cam sprocket.
Below you are looking at the left most sensor (it is pointed between the flywheel and block, not at the starter teeth). This sensor is the one that the pin will pass by. Roll your motor over clockwise like it was running. When the pin is centered on the VR sensor go to the front and check the placement of the window behind the camsync sensor. If your sensor is in the window your golden, if its about 180 degrees off give the motor another full revolution and recheck, if its not 180 degrees out but not in the window either then your pin is in the wrong location (you'll have to correct this before the motor will start).
Wednesday, November 24, 2010
Bell housing
I am working with the bell housing now. The spacer plate and bell housing have been welded together. There are a couple of areas that I'm reinforcing by adding material. The area that the starter goes through will get a cover made for it. I still have to cut away a portion of the spacer plate to allow for the rpm and position sensors to pass through. There is also the original 931 starter boss that needs a cover made.
The steel coolant line that runs the length of the drivers side of the block has been modified to remove the provisions for the turbo cooling pump. The aluminum water manifold just under the intake manifold still has to be dealt with as it has two passages for the turbo pump that need to be blocked. Looks like I will just weld them closed also.
The oilpan is resealed and torqued down. I've got a new timing set to install, make an adapter for the hydraulic through out bearing and I think the motor can probably go back in. We'll see what else crops up that needs attention.
Friday, October 29, 2010
Its getting colder again
I don't care for cold weather much and its headed this way again. That also means that we have passed the one year mark since the motor was pulled. I was hoping to have it done before now, but oh well. I turned on the lights over the week end and everything on the rear of the car was working. The front still has everything removed for now. Hopefully the wiring is pretty much done chassis wise. The motor is coming back out this weekend hopefully for the last time before we try to start it. While that is out I'm having the turbo overhauled, installing the clutch parts, pulling the head (to have a peak at the cylinder conditions), and some general house keeping.
Subscribe to:
Comments (Atom)


