Saturday, June 11, 2011
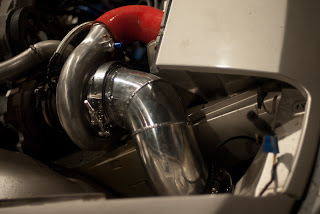
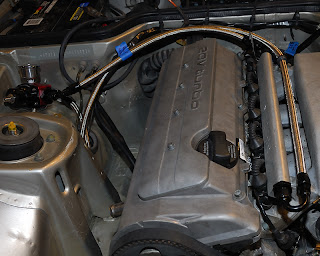
Engine picture
I spent today working on getting the Race Technology dash running better. You have to tell it what every channel coming into is, what you want it called, and where to display the info. While I was working on getting the fuel sender functioning I realized that I had made a mistake in the wiring for it. Apparently there is some functionality in the original gauge that gets lost when you remove the cluster. I had to add in a pull up resistor and change the reserve fuel circuit a bit, but it is functioning now. I will calibrate the dash on that circuit tomorrow. I also want to move the fuel pump and fan relay circuits onto the vems tomorrow. Then I can control when they come on an off from within the computer. I'll leave in the override switches, never know when I might need one again.
Thursday, June 9, 2011
Event pics
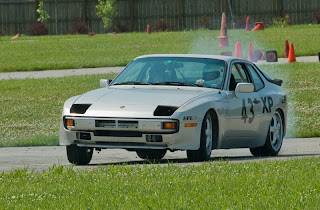
I never had the car smoke the tires coming out of a corner before! After we do the suspension work and add some nice sticky tires it just might be a rocket ship.
Saturday, June 4, 2011
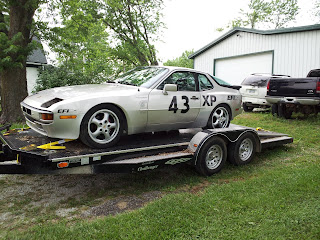
Loaded up
Friday, May 27, 2011
Ramblings
Tuesday, May 24, 2011
I figured that everyone has been waiting for this...
Saturday, May 21, 2011
Wednesday, May 18, 2011
Supplemental power
I should have seen this coming. When it comes down to it there isn't really enough fuse slots to reuse for the engine transplant. I'd hate to pile a lot more onto the dme relay, since they can already be problems. I just got in a seven circuit fuse panel to support some of the stuff in the car. Installing it and doing the last wiring bits is on the plate for tomorrow. There will be pictures of this also.
Exhaust assisted CCV is done
This whole bit here may have to be changed depending on the class I race in. They still haven't decided if it is legal or not. Anyway it is pretty simple. You collect gases from the port on the back of the head and the block, they pass through a filter of sorts (i used a pro vent), and then they go into the exhaust pipe. The whole purpose is to not put oil vapor into the intake and maybe get some negative pressure into the crankcase. Who knows how effective it really is, but we're trying it out.
Power Steering is done!
That pretty much said it all. Hopefully it works right with the recirculation and all. I'll drop some pics in so you can see where everything ended up.
Turbo plumbing
I finished up the turbo plumbing, to include the air filter/connecting pipe and the boost control solenoid. I made the intake pipe from a 4"drawn aluminum elbow. It took a bit of cutting, fitting, and rewelding but it worked out pretty well. To preserve all the space I could I removed a section of the turbo inlet and installed provisions for a v-band clamp. I'll drop some pics in here when I can.
Monday, May 16, 2011
Lots new
I have done a lot of stuff to the car recently, working on it just about every spare second that I have. Last night I actually cracked the motor over for the first time.
Monday, March 28, 2011
Thermostat housing adapter
You can see that it passes very close to the water pump. I had to make it in this manner so that the alternator (which isn't installed in this pic) will have enough room to move around just to the right of the pipe. It's adjustment arm travels over the water pipe to the mount by the cam sync sensor (not installed in the picture either).
Here is a little different angle. The AAN comes with a composite thermostat housing, this one is off of a 7a I think, but it could have been an older motor. I got lots of parts like this from Force 5 Salvage. You can google them if you need some bits.
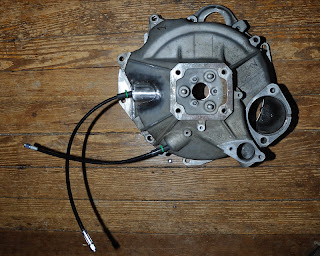
Bellhousing finished
All the lines are -3AN. The supply line goes through the original fork hole and the bleed line goes through an opening that I made.
One shot from the rear face. The lines are braided stainless with a teflon jacket, but I put some rubber hose around them for protection where they pass through the bellhousing.
This is a closeup of the boss that I fabbed for the bleed line to pass through. It was made from some 120" thick aluminum tubing and welded into place.
Intake system
Here you can see the bolt I was talking about. The small gold wheel used to change the cable direction is actually for a shower door. It has sealed bearings and seems to be a good fit for the application. Lots of goosing the throttle has yet to make the cable come off the wheel, but I'm still concerned that this may need some attention.
This is showing the room we now have between the brake master cylinder and the intake. I used the stock 944 cable and didn't modify anything else in the system to get it to function again.
Fuel System
Here is the front of the EFI Express rail, you can see that the forward lifting point is going to be in the way. I bought another lifting point and modified it. I removed the lifting eye, moved the mount for the cam position sensor down and added an attachment point for the alternator adjustment.
Here is a view from the front with the new 630 cc injectors. The braided lines attach to the stock hard lines in the passenger wheel well.
This one shows the location of the Aeromotive FPR. In the upper left you can see the LS series coil pack replacement units that I sourced from EFI Express. They are located where the heating and a/c unit used to live. A little hole cut through the sheet metal lets the coil leads pass from the motor straight to the coils.


